- Sculpey Oven Bake Clay (about $5)
- Mod Podge- Water base Sealer- Gloss (less than $4)
- Little Succulents of your choice
- Wax paper to protect your counters
All the supplies can be purchased at Michaels (minus the succulents) and Walmart has the clay and succulents (not sure about the gloss).
 |
| 1/4 of this box was left over after making 4 little pots. |
 |
| Apply a few coats. You will have plenty left over. |
How to:
- Lay out wax paper to protect your surface.
- We wanted our pots to be small and cute. We used a small can from the pantry as a model so that we wouldn't get carried away. :) You will need different objects to make patterns in your clay and a knife to cut the clay with. We gathered random objects in my kitchen... a fork, ravioli press, bottle caps, toothpick, a party horn, etc.

1. Loosen the clay by rolling it around in your hands. It starts out pretty stiff. Once it's moldable, stretch it out and place it on the wax paper. We used a rolling pin to get it thin and perfectly flat.
2. We used the small can as a mold for the bottom and cut a hole for drainage.
3. Once the clay is rolled out and pretty even, we used a knife to cut it into a long rectangle (about 3 inches high and 10 inches long). All that matters is that it can be completely wrapped about the base that you made AND that it can stand on it's own. If it is too tall or thin, it will fall over or rip during the baking process. I found that out the hard way. :)
 |
| Notice the one on the right... too tall and too thin to make it in the oven. :) |
4. On your long rectangle of clay, create a pattern by using objects to press designs into the clay. Try not to make it go all the way through.
5. Once you have decorated the clay (all except the face), wrap the clay into a circle that can be connected to the base that you previously made. It is pretty sticky and will start to stand like a plant pot. Make sure there are no little holes at any of the seams. You can just press them out with your fingers.
6. Add the face to the front of the pot... We used clay rectangular noses and a toothpick to make the eyes and mouth. You can do anything you like.
7. Follow the baking instructions. We baked 5 pots at a time and it look about 35 mins.
8. Once completely dry, you can glaze your pot with the Mod Podge. We used about 3 coats and waited 30 minutes between coats. Really, we just left them on the table and when we walked by and noticed they were dry, we added more. Nothing complicated. If you want to add some paint and color (like my friend Emy did to the cheeks, do so before the glaze).
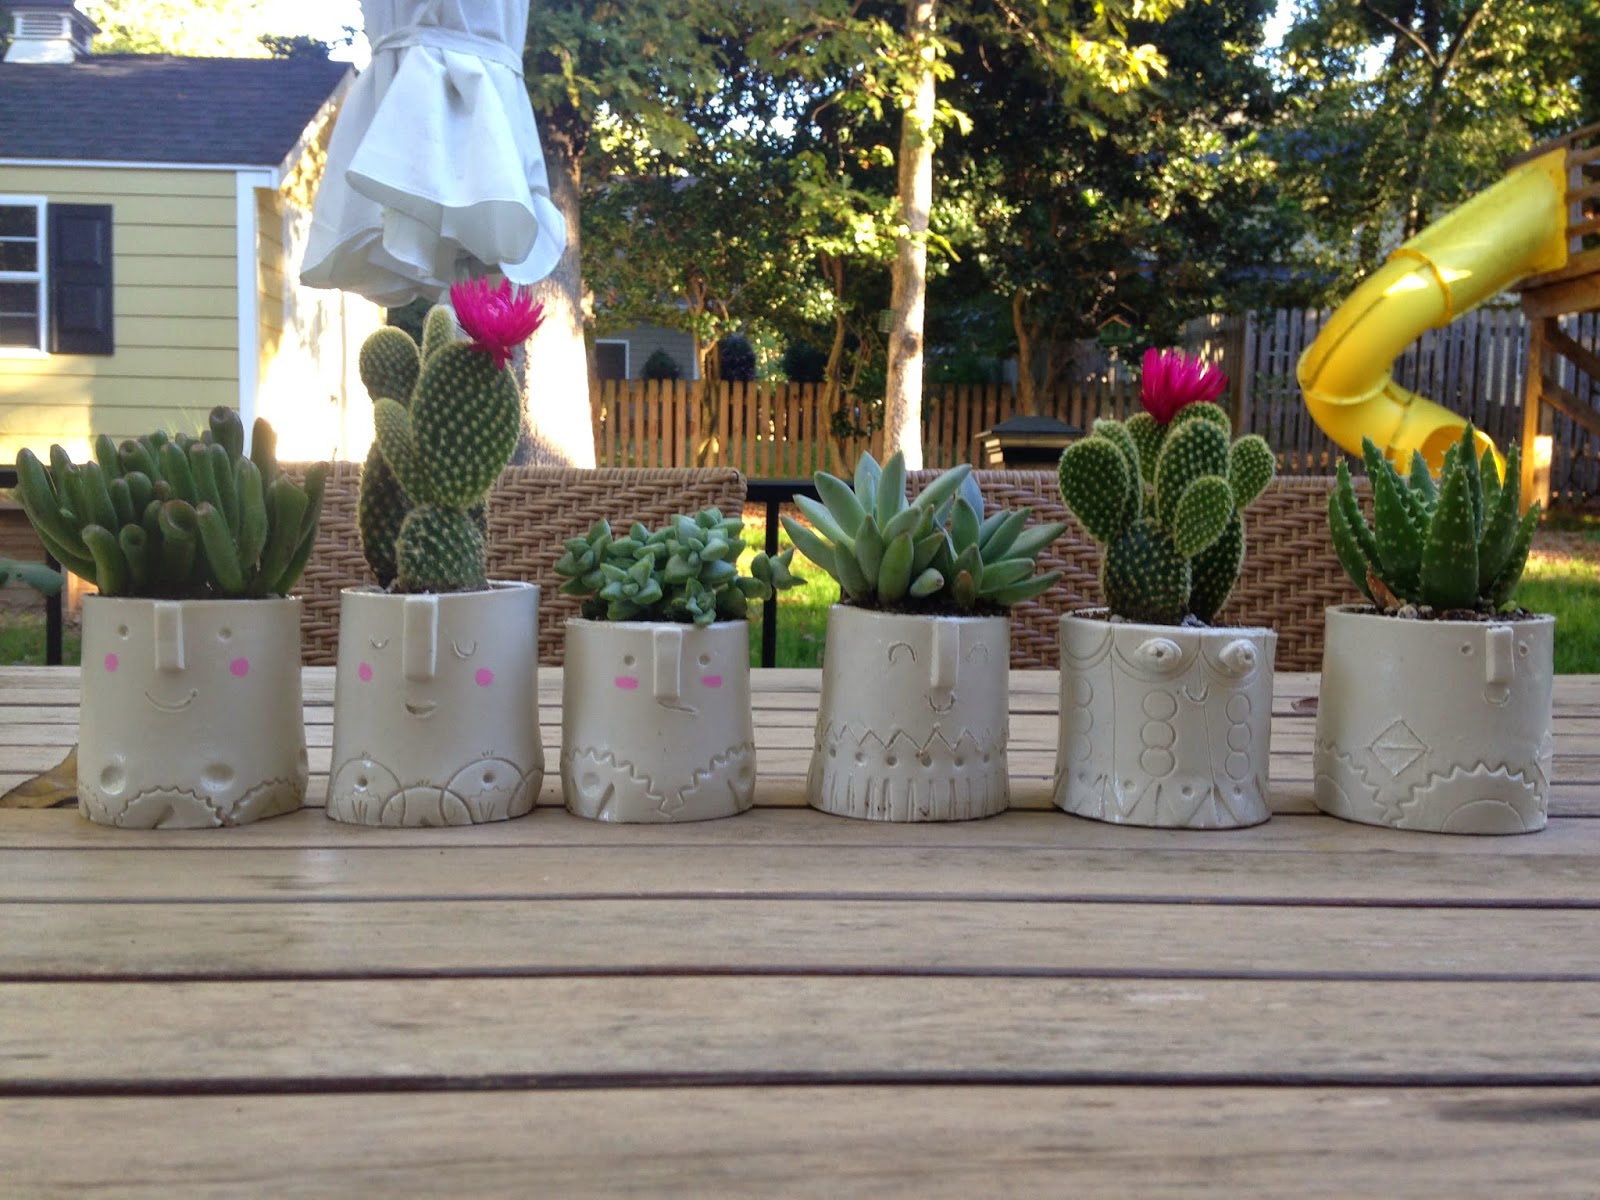
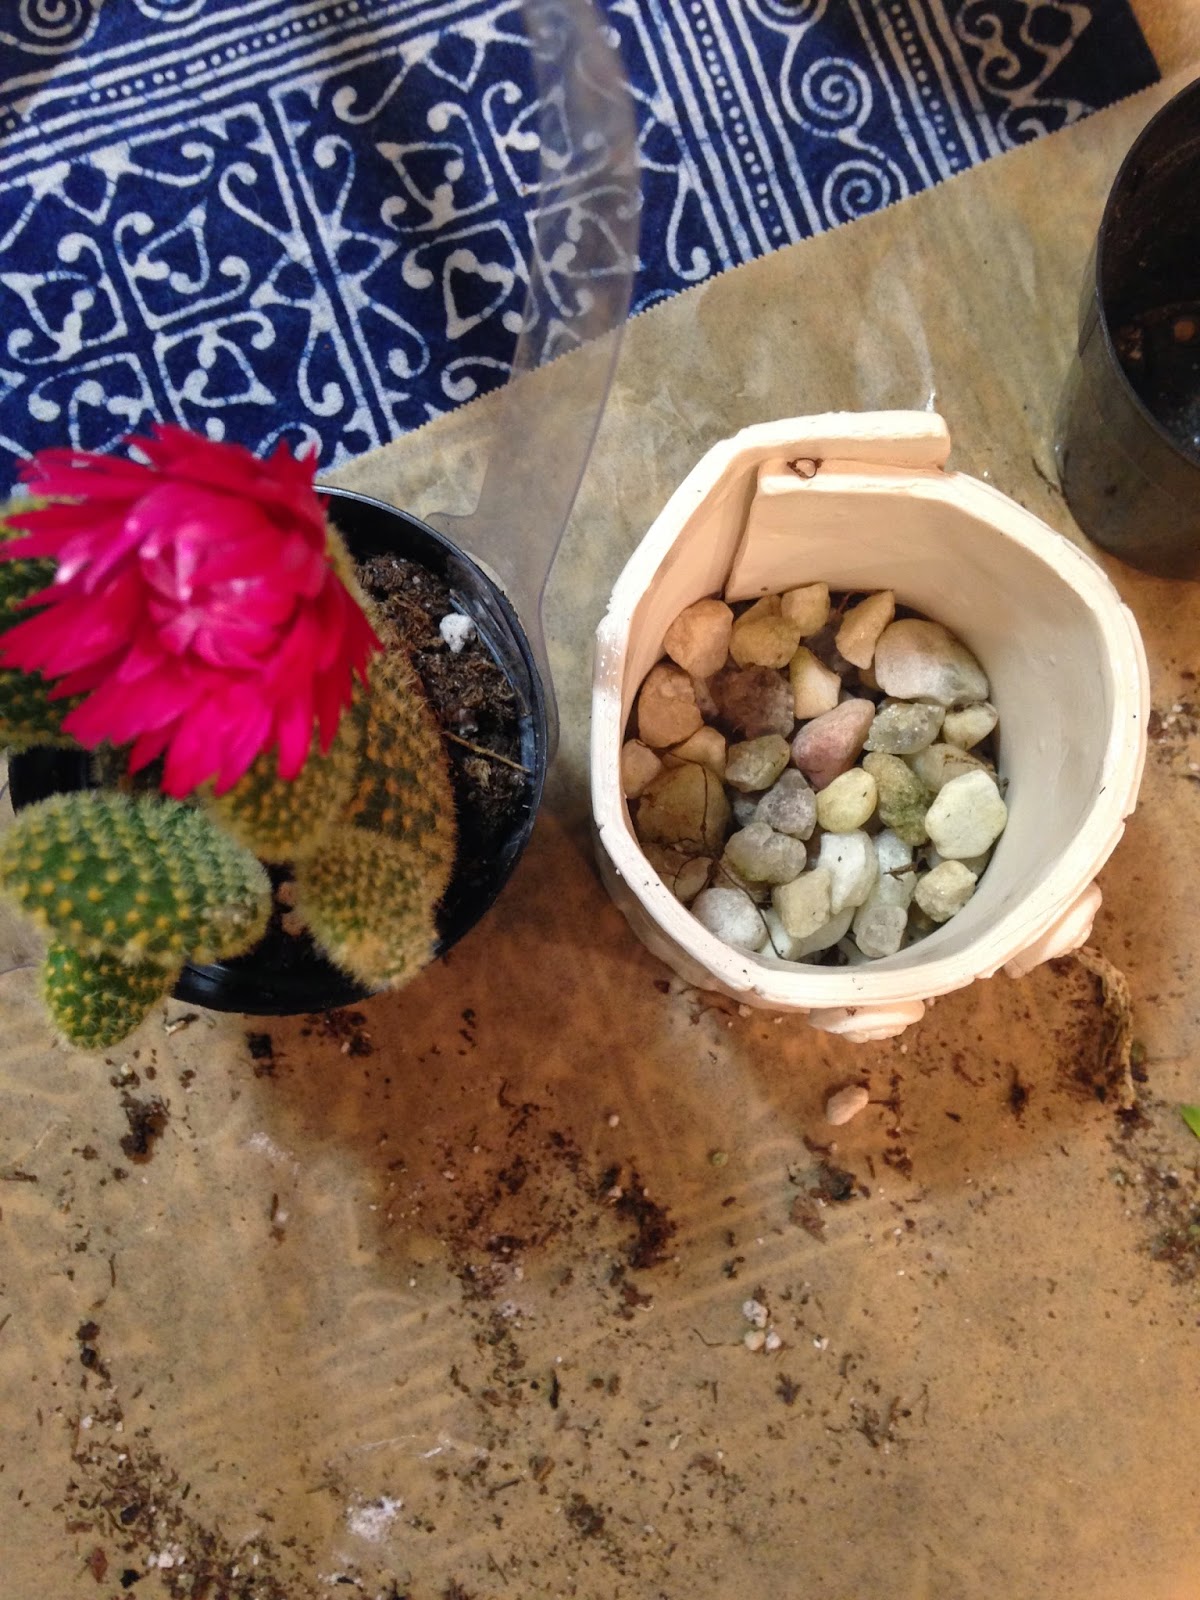
9. Add cute plants (we put some rocks so that the dirt doesn't just flow out of the bottom) and you're done!
The final product...


- Nicola & the little pup
No comments:
Post a Comment